Computer Science Wireless Local Area Network (WLAN) — Windows 7
Windows 7 has been discontinued by Microsoft and we no longer support it.
Please update your Windows to version 10.
Instructions below are for historical reference purposes only.
-
- Follow the guide to add Comodo certificates
-
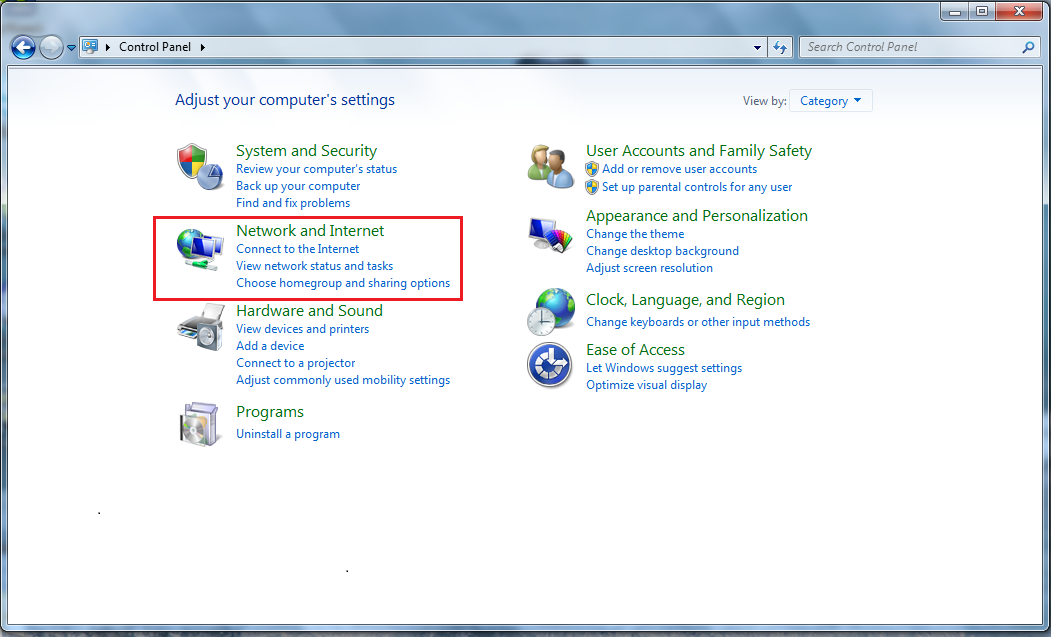
- Click Start and open Control Panel
-
- Select Network and Internet
-
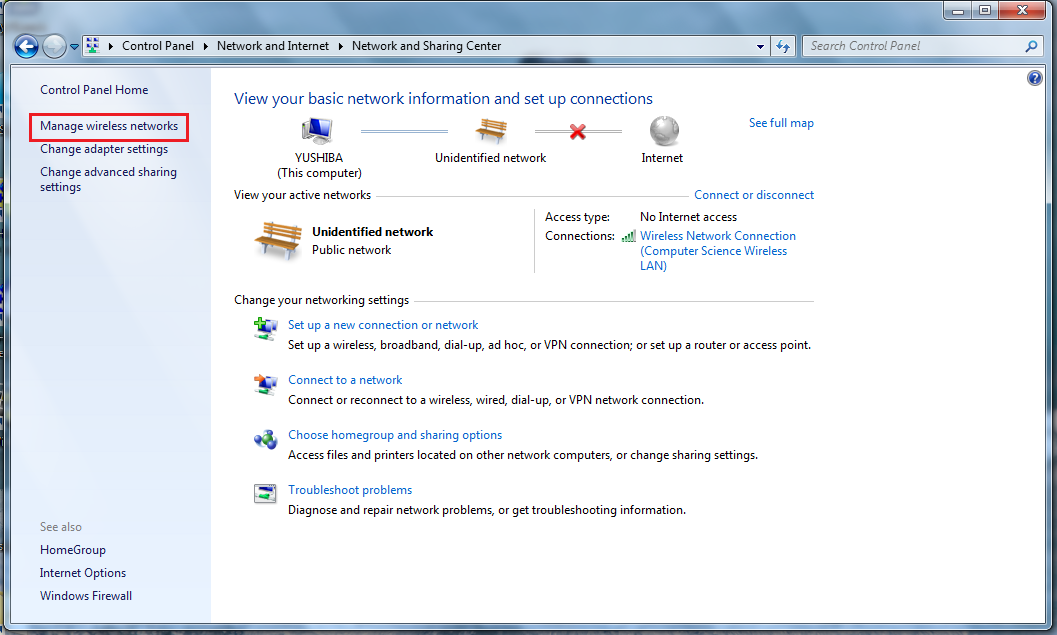
- Select Network and Sharing Center

-
- From the sidebar select Manage wireless networks
-
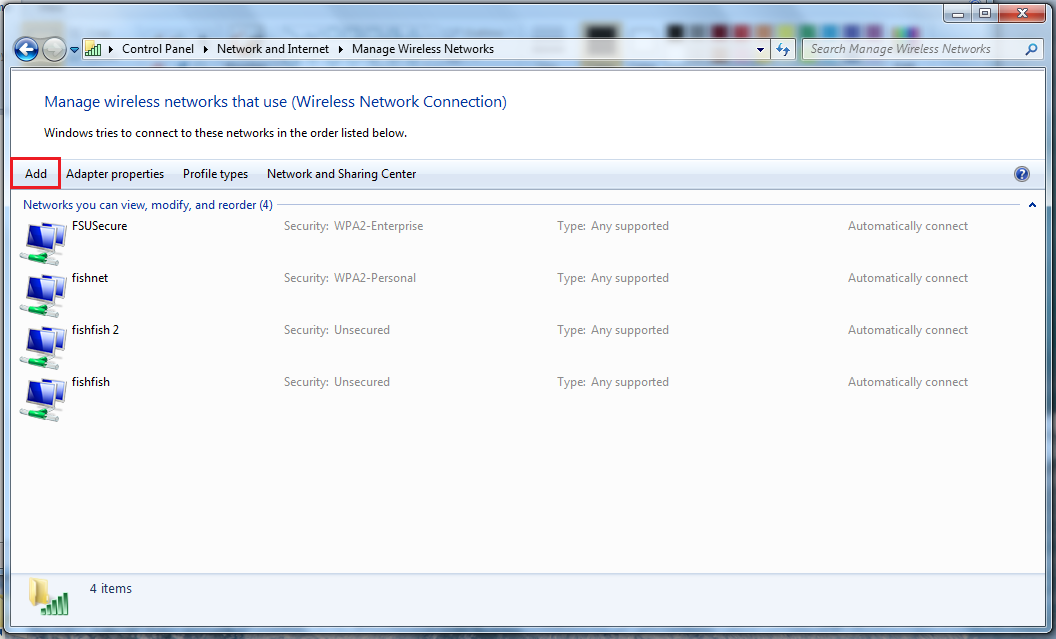
- Click Add
-
-
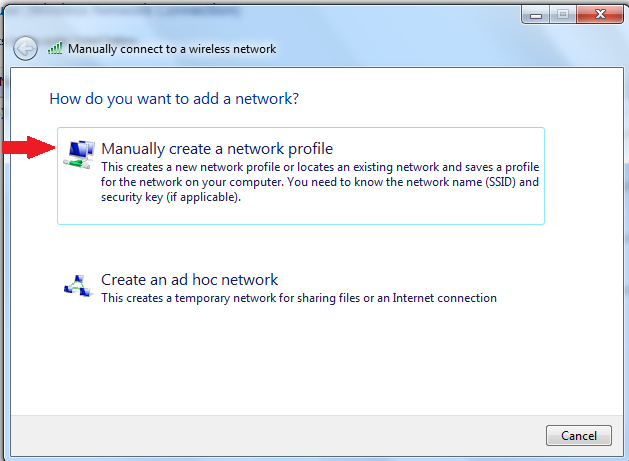
- Select Manually create a network profile
-
-
-
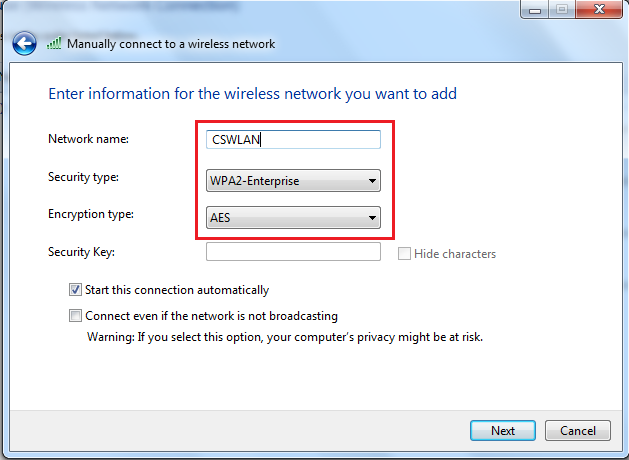
- Configure settings to the following:
- Network Name: CSWLAN
- Security Type: WPA2-Enterprise
- Encrption type: AES
- Please make sure Start this connection automatically is checked
- Configure settings to the following:
-
-
-
- Click Next when done
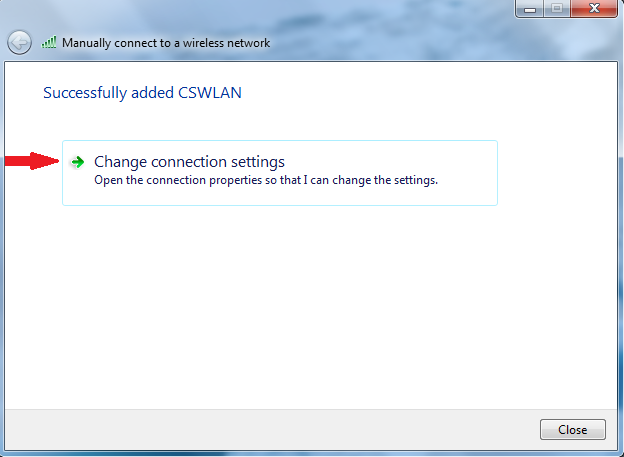
- Select Change connection settings
-
-
-
-
- NOTE: Under the Connection Tab Make sure Connect automatically when the network is in range is checked
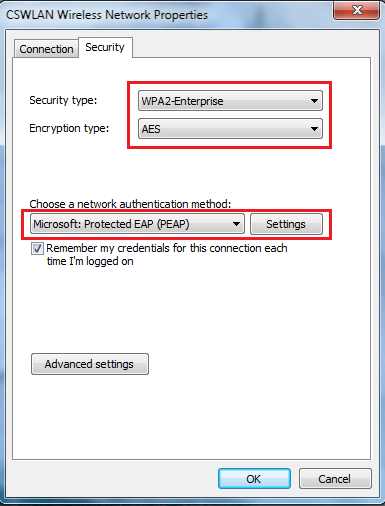
- Then click on the Security tab
-
-

-
-
- Confirm the following settings:
- Security Type: WPA2-Enterprise
- Encryption Type: AES
- Network authentication method: Microsoft: Protected EAP (PEAP)
- When done click the Settings next to the authentication method
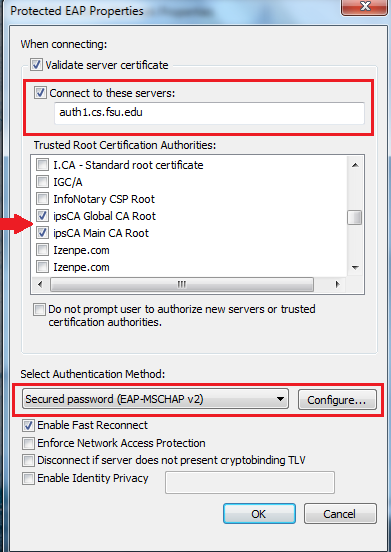
- In Protected EAP Properties:
- Check Validate server certificate
- Check Connect to these servers: and fill in auth1.cs.fsu.edu
- Under Trusted Root Certification Authorities check:
- Comodo CA Root
- Comodo Intermediate CA Root
- Under Select Authentication Method select Secured password(EAP-MSCHAP v2) and click Configure
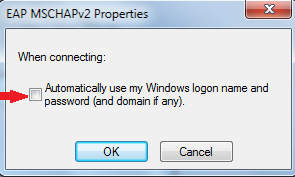
- Uncheck the box that says Automatically use my Windows logon name and password (and domain if any)
- Confirm the following settings:
-
-
- Click Ok on the EAP MSCHAPv2 Properties popup and then click Ok in the Protected EAP Properties box
- You should not be back to CSWLAN Wireless Network Properties. From here click Advanced settings
- In advanced settings:
- Check the box that says Specify authentication mode
- Select User authentication
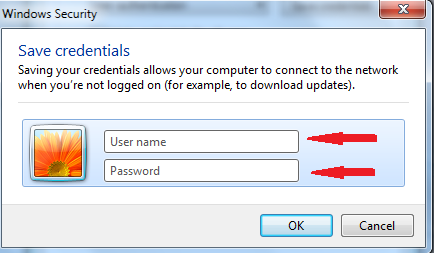
- Click Save credentials
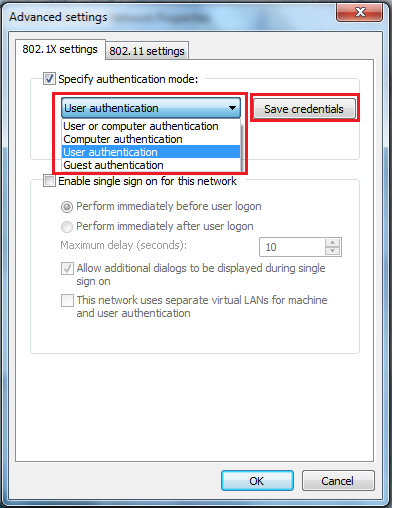
- You should not be prompted to enter your credentials
- User name: Your CS Username
- Password: Your CS Account’s Password
- Click Ok when done